HTML、CSS优化
能用 HTML/CSS 解决的问题就不要用 JS
导航高亮
可以用 class 来标识菜单是否选中,选中的 class 增加特殊样式,:hover 选择器可以用来表示鼠标悬浮的样式
鼠标悬浮时显示
使用 :hover 选择器实现
自定义 radio/checkbox 的样式
input 始终隐藏,通过设置 span.checkbox 的样式来实现自定义样式,通过 :checked 伪类更改选中状态的样式
1 | <style> |
多列等高
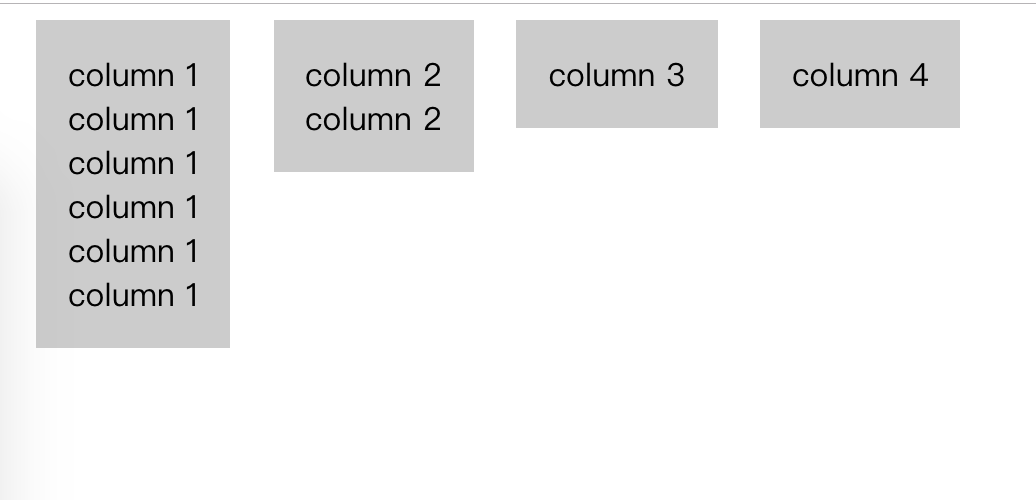
借助 margin/padding 实现
通过设置很大的 padding 值,使得高度变的很大,不可取。借助 table 自适应特性
代码如下1
2
3
4
5
6
7
8
9
10
11
12
13
14
15
16
17
18
19<style>
.columns {
display: table;
}
.columns > div {
padding: 16px;
margin-left: 16px;
display: table-cell;
background: #ccc;
border: 1px solid #000000;
vertical-align: top;
}
</style>
<div class="columns">
<div>column 1<br>column 1<br>column 1<br>column 1<br>column 1<br>column 1<br></div>
<div>column 2<br>column 2<br></div>
<div>column 3</div>
<div>column 4</div>
</div>效果:
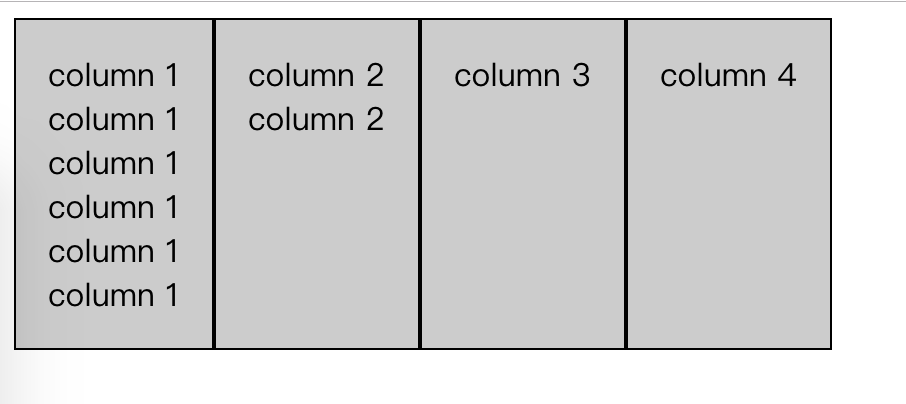
使用 flex 布局实现
代码如下:1
2
3
4
5
6
7
8
9
10
11
12
13
14
15
16
17
18
19<style>
.columns {
display: flex;
align-items: stretch;
}
.columns > div {
padding: 16px;
margin-left: 16px;
background: #ccc;
border: 1px solid #000000;
vertical-align: top;
}
</style>
<div class="columns">
<div>column 1<br>column 1<br>column 1<br>column 1<br>column 1<br>column 1<br></div>
<div>column 2<br>column 2<br></div>
<div>column 3</div>
<div>column 4</div>
</div>效果:
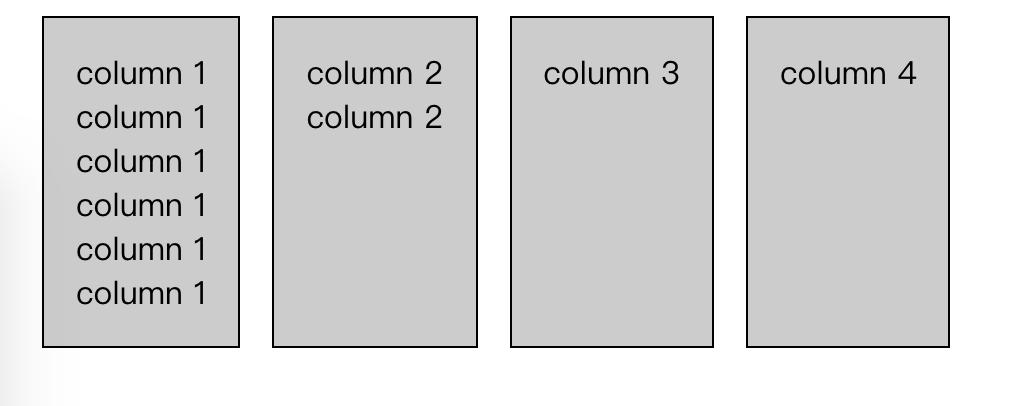
根据个数显示不同样式
例如有 1-3 个 item 在同一行,但 item 但个数不一定,如果只有 1 个,则占宽 100%,有 2 个时占宽 50%,3 个时每个占宽 33%。可以使用 css3 解决(~ 表示兄弟选择器)
1 | <style> |
hover 时候显示提示信息
使用 title 属性觉得效果太差,可以使用 :hover::before 来做
1 | <style> |
效果:

优化 HTML 标签
选用合适的标签
文字
如果它是一段文字,就用 p 标签,如果是一个标题,就用 h1~h6 标签。这样可以让标签多样化,写样式时候用标签选择器,就不用嵌套很多 class 了,并且有利于 SEO。表单
如果是一个表单,尽量使用 form。HTML5 input
浏览器会根据不同的 input 做出相应的优化,例如在 iPhone 上,使用不同的 input 会弹出不同的键盘。
使用 HTML5 语义化标签
传统的 HTML 结构
1 | <ul> |
使用 HTML5 语义化标签
1 | <nav></nav> |
这样有利于 SEO,屏幕阅读器也会先获取大纲。
上面的标签和 div 的区别:
- div:作为一个普通的容器使用;
- section:作为一个普通的章节;
- article:适用于独立性较强的内容,如网页文章的主体;
- nav:适用于导航内容;
- aside:可用作和页面主题相关的容器,像侧边栏、评论等辅助的元素。
css 画三角形
设置一个有 border 的容器
1
2
3
4
5
6
7
8
9
10
11<style>
.triangle {
border-top: 50px solid #000;
border-right: 50px solid #333;
border-bottom: 50px solid #666;
border-left: 50px solid #999;
width: 100px;
height: 100px;
}
</style>
<div class="triangle"></div>
去掉宽度和高度
1
2
3
4
5
6
7
8
9
10
11<style>
.triangle {
border-top: 50px solid #000;
border-right: 50px solid #333;
border-bottom: 50px solid #666;
border-left: 50px solid #999;
width: 0;
height: 0;
}
</style>
<div class="triangle"></div>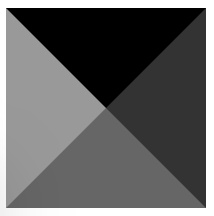
再把 border-top 去掉
1
2
3
4
5
6
7
8
9
10<style>
.triangle {
border-right: 50px solid #333;
border-bottom: 50px solid #666;
border-left: 50px solid #999;
width: 0;
height: 0;
}
</style>
<div class="triangle"></div>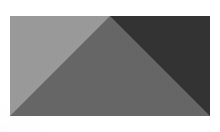
把左右两边的 border 颜色设置成透明
1
2
3
4
5
6
7
8
9
10<style>
.triangle {
border-right: 50px solid transparent;
border-bottom: 50px solid #666;
border-left: 50px solid transparent;
width: 0;
height: 0;
}
</style>
<div class="triangle"></div>
添加阴影
可以使用 filter 添加阴影1
2
3
4
5
6
7
8
9
10
11<style>
.triangle {
border-right: 50px solid transparent;
border-bottom: 50px solid #666;
border-left: 50px solid transparent;
width: 0;
height: 0;
filter: drop-shadow(0 0 2px #999);
}
</style>
<div class="triangle"></div>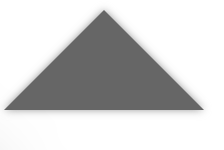
更多的 css 形状见 css-tricks
尽可能的使用伪元素
使用伪元素画分割线

1
2
3
4
5
6
7
8
9
10
11
12
13
14
15
16
17
18
19
20
21
22
23
24
25
26<style>
.line {
position: relative;
width: 500px;
text-align: center;
}
.line:before,
.line:after {
content: '';
position: absolute;
top: 12px;
height: 1px;
background: #ccc;
width: 200px;
}
.line:before {
left: 0;
}
.line:after {
right: 0;
}
</style>
<div class="line">line</div>清除浮动
1
2
3
4
5
6
7<style>
.clearfix:after{
content: '';
display: table;
clear: both;
}
</style>
本站点所有文章除特别声明外,均采用 CC BY-NC-SA 4.0 许可协议。转载请注明来自 吕钒的后花园!